Hey, this is Jeanette,
My sister Jess and I spent 8 unforgettable days driving the Pacific Coast Highway from San Diego to San Francisco. While we went in summer, I’m convinced fall is actually the perfect time for this trip—fewer crowds, better camping availability, and, honestly? Way cheaper accommodations.
Want the full printable itinerary? [Download our free PCH Road Trip Checklist]
There is so much you can see on your California road trip. The California Pacific Coast Highway Road trip has become one of the most popular. The gorgeous coastal scenery feels endless, and along the way, you can hit the most iconic travel destinations
With the weather cooling down, the best times to drive the Pacific Coast Highway are definitely around mid-fall, right before Christmas.
Planning your PCH adventure? Don’t have a car? Find the perfect rental vehicle on Expedia
Let me walk you through exactly how we spent our 8 days on California’s most iconic coastal drive, what we loved, what we’d do differently, and why you should seriously consider going in the fall instead of summer.
Let’s dive into the perfect 8-day itinerary, must-see stops, and essential tips to make your Pacific Coast Highway road trip unforgettable.
Best Time to Drive the Pacific Coast Highway (+ Weather Tips)
You can practically take the California road trip any time of the year. There really is no perfect time. But if you want to push for the best weather and time, then I say go in the fall.
You can drive the PCH year-round, but fall (September through November) offers the best conditions:
- Perfect temperatures – Cooler weather without summer heat
- Fewer crowds – More available camping spots and peaceful beaches (summer camping spots are booked months ahead)
- Clearer skies – Less marine layer fog than summer months
- Better rates – Hotels and campsites often have lower fall pricing
Keep in mind temperatures get cooler, especially for camping, so pack layers and warm gear for evening beach bonfires.
Pro tip: Book accommodations 2-3 months ahead for fall travel. Search PCH hotels on Expedia.com
Jess, Jeanette & Tutú’s Beach Day Must-Haves
Tap the icons below to view each product.
Our 8-Day PCH Itinerary: San Diego to San Francisco
What We Packed (Essentials You’ll Need)
Before we dive into the daily breakdown, here’s what saved our trip:
- Hydro Flask Cooler Bag ← (for beach picnics and keeping snacks cold)
- Car phone mount ← (the PCH has lots of winding roads—you need GPS)
- Sand-proof beach blanket ← (game changer)
- Portable Phone charger ← (we took SO many photos)
[See our complete PCH packing list →]
Here’s exactly how Jess and I spent 8 days exploring California’s coast. Feel free to adjust—some people do this in 5 days (rushed!), others take 10-14 days (ideal if you have time).
Take the time to explore and have fun along the way. Don’t rush your road trips. A road trip should be fun and feel free!
Day 1: San Diego to Los Angeles via Amtrak
Since we live in San Diego and have already explored [every dog-friendly beach here], we decided to skip the San Diego portion and jump straight to LA.
First, we decided to explore Venice Canals or Venice Beach Canals, which are a hidden part of Los Angeles.
It’s really cool to learn the history behind the Venice Beach Canals. A lot has to do with the inspiration of the actual Venice canals of Italy. These Venice canals are nestled in the middle of a neighborhood. You can actually walk through the neighborhood to explore them. I don’t think you can actually paddleboard or kayak there, but I did see a lot of boats belonging to the houses connected to the Venice canals that most likely belong to them.
After that, we drove over to Venice Beach (sorry, my Osmo died and I couldn’t really film the beach as I wanted). My sister luckily took plenty of pictures. It was really busy! And when I mean busy, I mean really busy!
It’s one of those beaches where the vibe is always popping. There’s lots of music, food, vendors, and even a skateboarding park. Venice Beach is also popular for its busy vibe, and Muscle Beach is one of the most popular gyms out there. It’s definitely something worth checking out.
We walked Venice Beach for a bit made our way up north.
Then we decided to stop at Santa Monica Pier!
Our hack: We took the Amtrak Pacific Surfliner from San Diego to LA instead of driving. Why? The coastal views are stunning, and we saved ourselves the nightmare of LA traffic on day one.
Cost: About $40/person one-way
Pro tip: Book the right side of the train (heading north) for ocean views
If you’re starting fresh in San Diego (not a local like us), definitely spend 1-2 days exploring:
- [Ocean Beach Dog Beach] – Tutú’s favorite!
- [Moonlight State Beach in Encinitas] – family-friendly
- [Torrey Pines] – hiking + beach combo
LA Arrival: We picked up our rental car in LA and hit Venice Beach and Santa Monica Pier. My Osmo camera died at Venice (rookie mistake—charge everything!), but we got great footage at Santa Monica.
Where we stayed: [Hotels near Santa Monica] ← Booking.com affiliate
Rental car tip: [We used Turo] ← Turo affiliate and got a great SUV with space for Tutú and all our gear
Day 2: Malibu Beach Hopping (All 4 Beaches in One Day!)
Make your way up to the Malibu Beach area. Not only is Malibu Beach known for its panoramic beach lifestyle, but it is also known for its very hip town and vibe. This beach, along with others around the L.A. area, is well known and popular among families and celebrities.
For us, Day 2 was all about those Malibu Beaches! We actually beach hopped 4 Malibu beaches in ONE day!
Exhausting?
Yes.
But if you have more time to explore these beaches, by all means, please do!
We started with Topanga State Beach! It was a local beach where you will find a lot of locals who enjoy surfing or sunbathing!
I really like this beach because it’s less crowded than the other, more popular beaches.
Then we headed over to Will Rogers State Beach.
It was a quiet beach, but so gorgeous nonetheless!
One thing we did notice, and I’m not so sure why, there were a lot of bees on the sand. I don’t know if they were attracted to the sand or the water, but whatever the reason was, I made sure not to step on them and kept my flip-flops on.
This beach is also a popular local beach.
There were a lot of locals here, and one thing I did notice, it has the space to walk. So if you’re looking to get your steps in them try out this beach!
After that, we hit up the most popular beach in Malibu! El Matador State Beach! It was here were we got a parking ticket. You can read our story here!
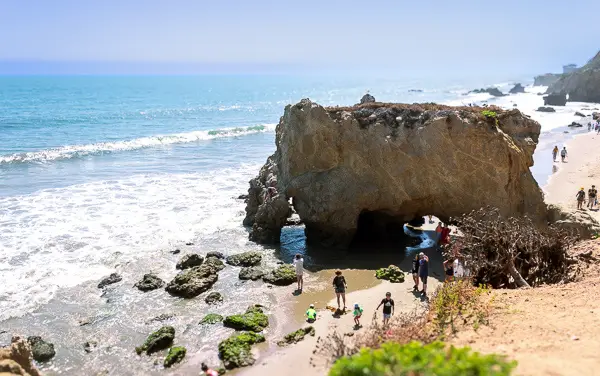
The views were gorgeous here! And yes, it was more crowded!
Check out our El Matador Guide before you visit here.
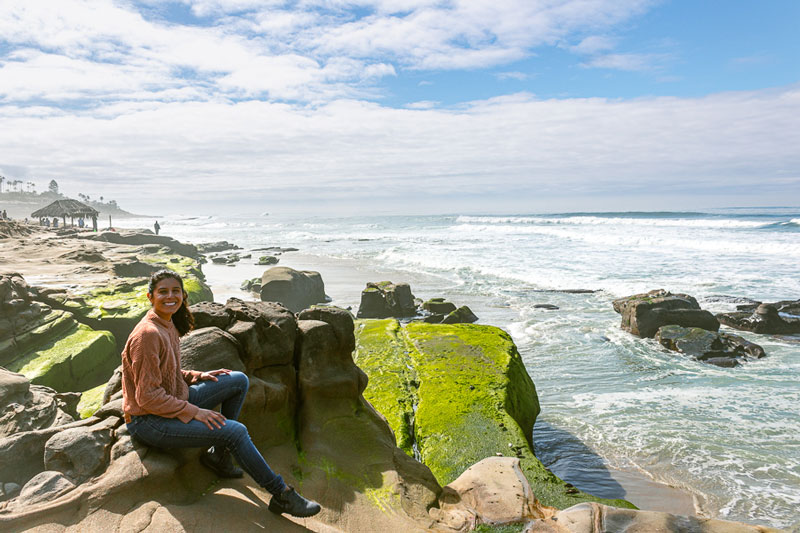
Finally ended at Leo Carillo State Beach! My favorite of all 4! I could seriously sit on the rocks all day watching the waves!
Day 3: Carpinteria → Santa Barbara → Pismo Beach
Carpinteria State Beach
Our next stop was Carpinteria, and honestly, we got hit with really cloudy weather (classic summer marine layer!). But I actually love this beach—it’s got excellent camping amenities if you book early, and it’s way more laid-back than some of the busier Southern California beaches.
Even though we got a super heavy marine layer in the morning, we walked the wooden boardwalk behind the sand dunes that led to the camping sites. There were a lot of people getting their morning stroll. It was so refreshing. One thing about this beach is that you should wear your shoes or sandals because we noticed a lot of sticks on the ground. Splinters are never fun!
Summer note: Even with clouds, it was still beautiful. Just pack layers!
Fall advantage: Clearer skies and better camping availability.
[Book Carpinteria camping spots] ← Recreation.gov link
Santa Barbara – A City Close to My Heart
Then we drove over to Santa Barbara, and this stop is extra special for us. One of my other sisters went to college here at UCSB, so I remember us visiting her all the time. This city brings back so many memories!
Santa Barbara has this perfect mix—retired folks enjoying the beach lifestyle and college students giving it energy. Don’t let that fool you into thinking it’s boring, though. The beaches here are absolutely gorgeous and surprisingly quiet.
What we did:
- Walked State Street downtown (so many cute boutiques and restaurants!)
- Hit the beaches (quieter than LA/Malibu beaches)
- Soaked in the nostalgia of our younger sister’s college days
Butterfly Garden reality check: We didn’t have time to visit the Goleta Monarch Butterfly Grove on this trip, but we’ve done it before and it’s incredible! Just remember—it’s seasonal (November-February only). This is one of THE best reasons to do the PCH road trip in fall/winter.
When you visit the butterfly grove, it’s a nice, easy walk to the garden area. What’s really cool is when you get to the location and observe the trees—you’ll spot thousands of Monarch butterflies clustered together. It’s such a neat sight to see and totally free!
Where we stayed: [Santa Barbara hotels] ← Booking.com affiliate – We got a room near the beach, and it was perfect for reminiscing about one of my sister’s college days.
Pro tip: If you’re visiting when butterflies are active (Nov-Feb), definitely add the [Goleta Butterfly Grove] to your Santa Barbara stop. It’s about 10 minutes from downtown.
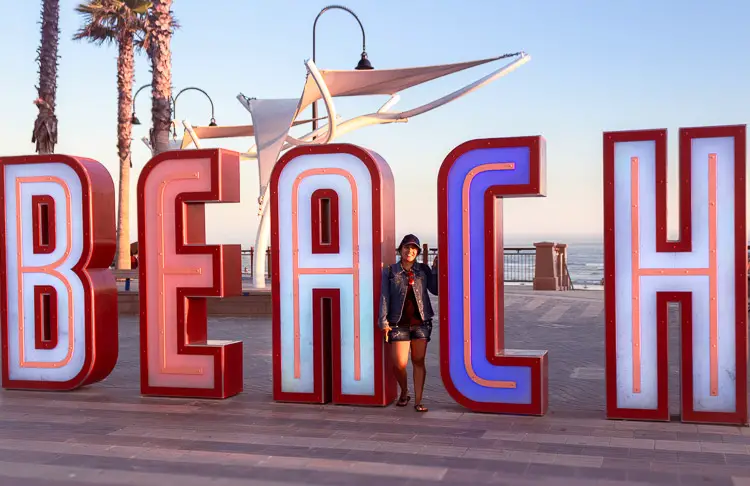
Pismo Beach – Our last stop
Our last stop was Pismo Beach, and timing was everything—we wanted to catch the sunset. We pulled in just in time, and it was spectacular! Between the golden hour lighting, the iconic Pismo Beach sign, and wandering the pier, it was the perfect way to end the day.
Day 4: Dinosaur Cave, Morro Bay, and Hearst Pier
There is so much you can see while visiting this beach, including the one and only famous Dinosaur Cave.
Have you ever wondered why they call it the Dinosaur Cave? Then be sure to read The Guide to Dinosaur Cave here, as we break down everything you need to know before visiting.
It is definitely a popular family-oriented beach destination, but it doesn’t matter whether you go with friends, family, or by yourself. The scenery from Dinosaur Cave makes you really appreciate how gorgeous nature really is.
The last time I went, I took my mom and dad to Dinosaur Cave. We did a quick roadtrip to Dinosaur Cave. Was it crazy!? Yes. Was it planned? not really. lol
My parents were up for the trip and came along.
The one thing I do remember is that it did have a bit of a sewer smell. My sister mentioned its because all the birds feces on the rock which made total sense.
Besides that, it was a nice stop, and the place was gorgeous.

Morro Bay
Morro Bay is practically the neighboring beach of Pismo. If you do have time to check out one or both of these beaches, then do so. Morro Bay is iconic for having a large ancient volcanic stone in the water.
The cool thing about this beach is that if you’re a photographer, then you can definitely benefit from the amazing photography here. Wait for the sunset if you can. The colors are just gorgeous.
If you want to spice up your Instagram, then definitely consider it a go-to destination. You don’t need a fancy camera; any phone will do, too. Nowadays, who isn’t a photographer?
The neat thing about Morro Bay is that you have the beaches to check out, which include over six miles of sand to play in, and you have the harbor side of it.
Here you can find a lot of fishermen looking for the catch of the day, which makes up a lot of the local seafood found in restaurants.
Let’s not forget the sea otters that love basking in the sun
Chances are, you are taking the 1-North. This highway is the most scenic you can take when you take a road trip to the California coast.
Hearst Castle

One of the nice places to check out, with a small detour along the way, is Hearst Castle! This neat location is a museum and an iconic mansion where one man’s dream started on a hill.
I have definitely been here several times, and I love to hear the story of William Hearst. If you tour the mansion you will definitely see the place he had always dreamed of building.
It is pretty neat as you take the walking tour with your guide. They explain the history of each room. At the end of the tour, you can check out the film of Willian Hearst and his dream of building his mansion.
The iconic view of the ocean is just spectacular.
Day 5: Big Sur, Bixby Bridge, McWay Falls, Monterey Bay
As you make your way past Hearst Castle, you will end up in Big Sur!
Not only is Big Sur one of the most well-known beach areas in all of California, but the panoramic view has made it even more popular and amazing.
I suggest you go in the fall, since there is more availability! Or book 6 months in Advance
This day was absolutely packed with some of the most stunning sights along the entire Pacific Coast Highway. We hit five incredible stops, and honestly, each one was more beautiful than the last. If you can, give yourself a full day for this section because you’re going to want to take your time at each spot.
Bixby Bridge
We started our day at the iconic Bixby Bridge, and let me tell you, seeing it in person is so much better than any photo. This architectural masterpiece was built in 1932 (not 1883 as some sources claim—I double-checked!), and it’s one of the most photographed bridges in California for good reason.
The bridge spans 714 feet across a deep canyon, and the views from both sides are absolutely incredible. We pulled over at the lookout point on the north side, where you can safely park and snap some photos. The bridge frames the coastline perfectly, and if you’re lucky enough to catch it with some morning fog rolling in, it’s absolutely magical.
Pro tip: Visit early in the morning to avoid crowds and get the best lighting for photos (although the marine layer is heavy, it still gives a good picture). There’s limited parking, so weekday mornings are your best bet.
Photography Gear: Want to capture those stunning bridge shots? Check out these travel camera accessories perfect for road trip photography.
McWay Falls
Next up was McWay Falls in Julia Pfeiffer Burns State Park, and this place is straight out of a fairy tale. Picture this: an 80-foot waterfall cascading directly onto a pristine beach with turquoise water. It’s one of only two waterfalls in California that fall directly into the ocean!

The best part? You don’t need to do a strenuous hike to see it. There’s a short, easy trail (about half a mile round trip) that takes you to an overlook where you can see the falls and the beach below. The trail is paved and accessible, making it perfect for all fitness levels.
We spent about an hour here just soaking in the views. The beach below is off-limits to visitors (it’s protected), but honestly, the view from above is so spectacular you won’t mind. The contrast of the waterfall, the golden sand, and that bright blue-green water is something you’ll never forget.
Important: There’s a $10 day-use parking fee, and the lot fills up quickly, especially on weekends. Try to arrive before 10 AM or after 3 PM to snag a spot.
Camping Essentials: Planning to camp in Big Sur? Shop quality camping gear and equipment here to make your stay comfortable.
Point Lobos State Reserve
After McWay Falls, we headed to Point Lobos State Reserve, and oh my goodness, this place is a hidden gem! It’s often called “the crown jewel of California’s state park system,” and after visiting, I totally understand why.
This reserve is absolutely stunning, with dramatic rocky cliffs, hidden coves, and crystal-clear water. We saw sea lions lounging on the rocks (you can hear them barking from the trails!), and if you visit between December and May, you might even spot migrating gray whales from the shore.
There are several short trails throughout the reserve. We did the Cypress Grove Trail, which winds through a forest of twisted, wind-sculpted cypress trees—it feels like you’re walking through a piece of art. The Sea Lion Point Trail is another must-do, offering incredible views and those up-close sea lion encounters.
The water here is so clear that it’s popular with scuba divers, and we watched several divers entering the water at Whalers Cove. Even if you’re not diving, the tide pools along the shore are fascinating to explore (just be respectful and don’t disturb the marine life).
What to know: Point Lobos has a vehicle limit, so once the parking lots are full, they close the gates until someone leaves. Get there early! The reserve opens at 8 AM, and arriving right when it opens gives you the best chance of getting in without waiting. Entry is $10 per vehicle.
*Dogs are not allowed here 🙁
Where to Stay: Looking for accommodations near Big Sur and Monterey? Book hotels with ocean views here to wake up to stunning coastal scenery.
Monterey Bay Aquarium
By the time we reached Monterey, we were ready for something a little different, and the Monterey Bay Aquarium did not disappoint. This place is world-renowned, and it’s honestly one of the best aquariums I’ve ever visited.
The kelp forest exhibit is massive and mesmerizing—watching the fish swim through the swaying kelp is so peaceful. But my absolute favorite was the jellyfish gallery. The way they’re lit up in those dark rooms with the jellyfish just floating gracefully… it’s almost meditative.
We also loved the sea otter exhibit (I mean, who doesn’t love sea otters?), and the touch pools where you can gently touch sea stars and anemones. If you time it right, you can watch the sea otter feeding time, which is adorable and educational.
The aquarium sits right on the edge of Monterey Bay, and many of the exhibits feature animals that live in the waters right outside the building. It really connects you to the local marine ecosystem in a special way.
Insider tip: Buy your tickets online in advance! They often sell out, especially on weekends and during summer (even though you’re going in fall, it’s still busy). Tickets are around $50-60 for adults, and you’ll want to budget at least 2-3 hours to really see everything.
Book Your Tickets: Reserve your Monterey Bay Aquarium tickets in advance to guarantee entry and skip the ticket line.
Fisherman’s Wharf
We ended our day at Fisherman’s Wharf in Monterey, and it was the perfect way to wind down after such an adventure-packed day. This historic waterfront area is full of energy, with street performers, cute shops, and some seriously amazing seafood restaurants.
The wharf is home to several great restaurants where you can get super fresh seafood. We grabbed dinner at one of the waterfront places and watched the sea lions swimming around the docks below. They’re so playful and entertaining—definitely don’t miss the sea lions hanging out under the wharf!
There are also some fun shops selling everything from saltwater taffy to local art and souvenirs. We wandered around, grabbed some ice cream, and just enjoyed the sunset over the bay. If you’re into whale watching tours or fishing charters, many of them depart from Fisherman’s Wharf.
The atmosphere here is so fun and lively. There are usually musicians playing, the smell of clam chowder fills the air, and everyone’s just having a great time. It’s touristy, sure, but in the best possible way.
Where to Eat: Book a table at top-rated Fisherman’s Wharf restaurants for the freshest seafood and best waterfront views.
If you are bringing your fur baby along, then don’t forget to check out some friendly dog beaches such as Del Monte Beach and Carmel Beach.
PCH Road Trip Essentials: Car Prep We Learned the Hard Way
The first thing to remember when taking a long road trip is that you want to make sure your car is up for it. There are a couple of maintenance things you should keep in mind before plunging into a long road trip.
I personally learned this on one of my past road trips, and I also taught myself.
Quick story:
One of our first roadtrips was from San Diego to Orlando! And it was insane! I thought I was ready for the road trip, and I thought I had checked everything, but no. I learned I did not. My car broke down in Texas (the halfway point). And it broke down once more in Pensacola Beach, Florida, another checkpoint. lol.
Be sure you check:
- Must-check before leaving:
- ✅ Oil level – Bring extra oil (My very first road trip, we were almost stranded in the middle of the Arizona desert ← Amazon affiliate
- ✅ Coolant – We needed this!
- ✅ Tire pressure & tread
- ✅ Spare tire (check it’s inflated!)
- ✅ Brakes (mountain roads = lots of braking)
- ✅ Full tune-up (unless you’re renting a car)
Pack these in your car:
- Portable tire air compressor ← Amazon (our tire pressure light came on twice)
- Emergency roadside kit ← Amazon
- Jumper cables ← Amazon
- Roadside assistance ([AAA saved us in Morro Bay]
- Flashlight (You’ll be surprised how many times these come in handy)
Not car-savvy? Take your car to a mechanic BEFORE you leave. Seriously. The PCH has stretches with zero cell service—breakdowns are scary. I also had them do a quick inspection, a new oil change, and get my tires rotated on a previous road trip.
Total Cost Breakdown
People always ask how much our PCH road trip cost. Here’s the honest breakdown for 2 people:
- Rental car (8 days): $450 via Expedia (We rented it from LA)
- Gas: ~$300 (lots of driving!)
- Accommodations: ~$1,200 (mix of hotels, motels, camping)
- Food: ~$600 (we splurged on seafood)
- Activities/tours: ~$150 (Hearst Castle, parking fees)
- Dog fees: ~$100 ( If you plan on bringing your dog, then expect to pay some hotels ‘ pet fees)
Total: ~$2,800 for 8 days
Fall pricing estimate: You’d probably save $300-400 on accommodations alone.
Ready to Drive the PCH from San Diego to San Francisco?
Our 8-day Pacific Coast Highway road trip was one of the best adventures Jess, Tutú, and I have ever done. The coastal views, the beach towns, the freedom of the open road—it’s everything you’d hope for.
My advice? Go in the fall. Less crowds, better prices, and honestly, the weather is just as good (if not better).
Start planning your trip:
- [Download our free PCH Road Trip Checklist] ←
- Book your accommodations early ←with Expedia
- Rent a reliable car ← from Expedia
- Check out our [dog-friendly San Diego guide] if bringing pets
- Watch our PCH Day-by-Day video series on YouTube!
So tell me—have you driven the PCH? What was your favorite stop? And are you team summer or team fall? Drop a comment below!
-Jeanette